Users & Permissions
This section will go through the quick process of creating users for your Core system, as well as setting up Roles for them. This is a 3 step process.
Step 1 - Users
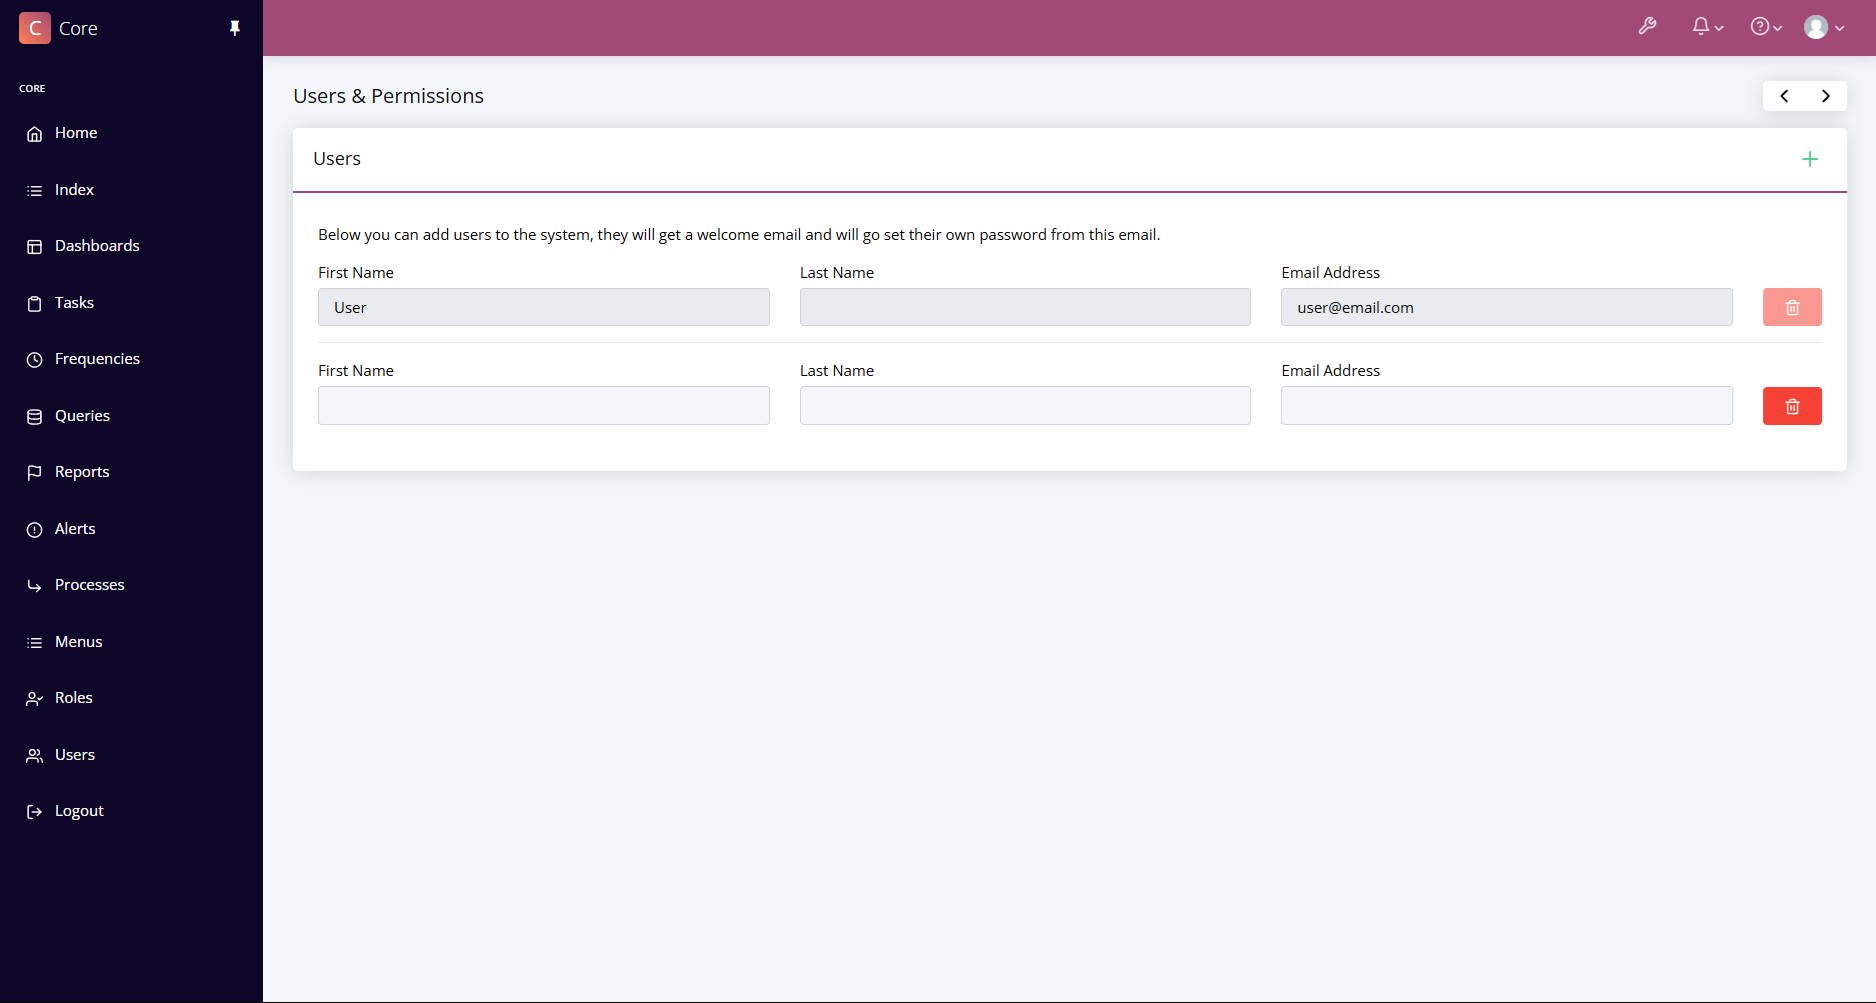
The first page is for making the users of your Core. By clicking the green plus in the top right corner, it will add a new row below. Each row in the section below will create a user. Users created here will be sent a welcome email to setup their password for Core.
Once all the users have been setup, click the right arrow in the top right to proceed to the next step. If you want to return to this step, you can click the left arrow in the top right to return to the previous step.
Step 2 - Roles
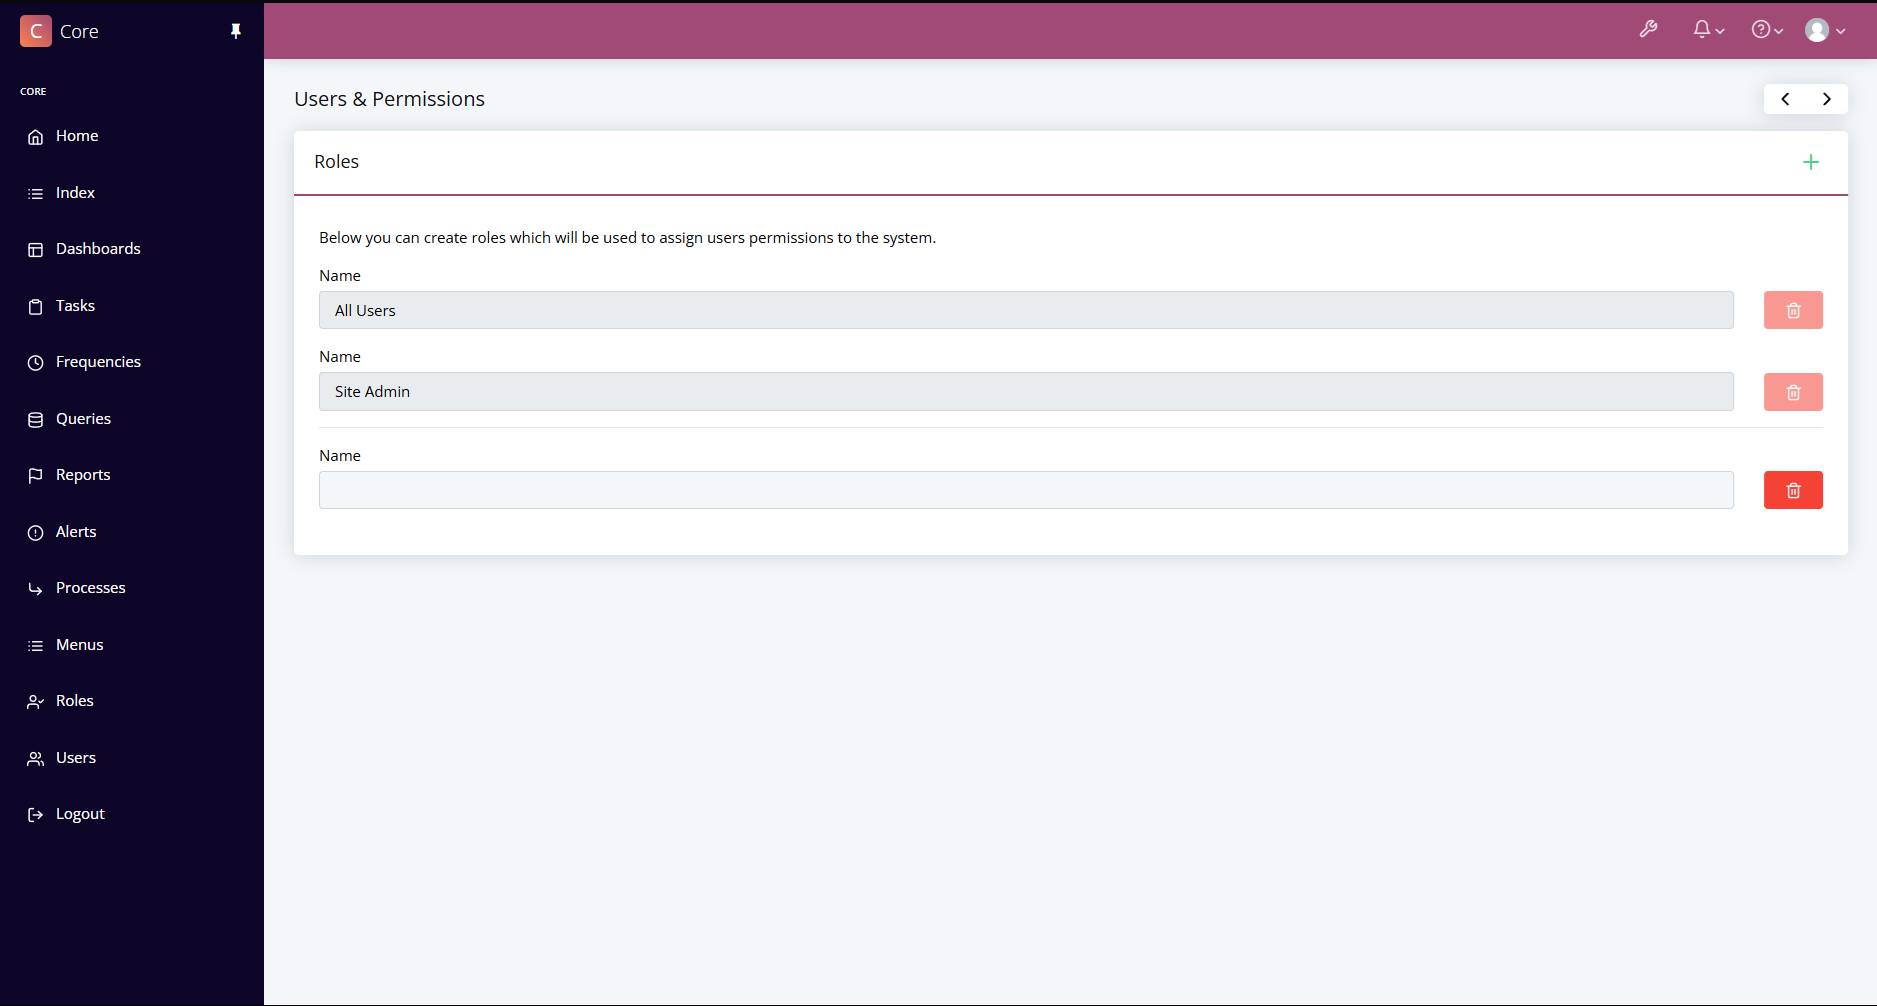
Similar to the Users section, the Roles section will make a new Role for each row listed in the table below. To add a new row, click the green plus in the top right corner of the page. This will only create the roles; the permissions for each role has to be setup after this section.
Step 3 - User Roles
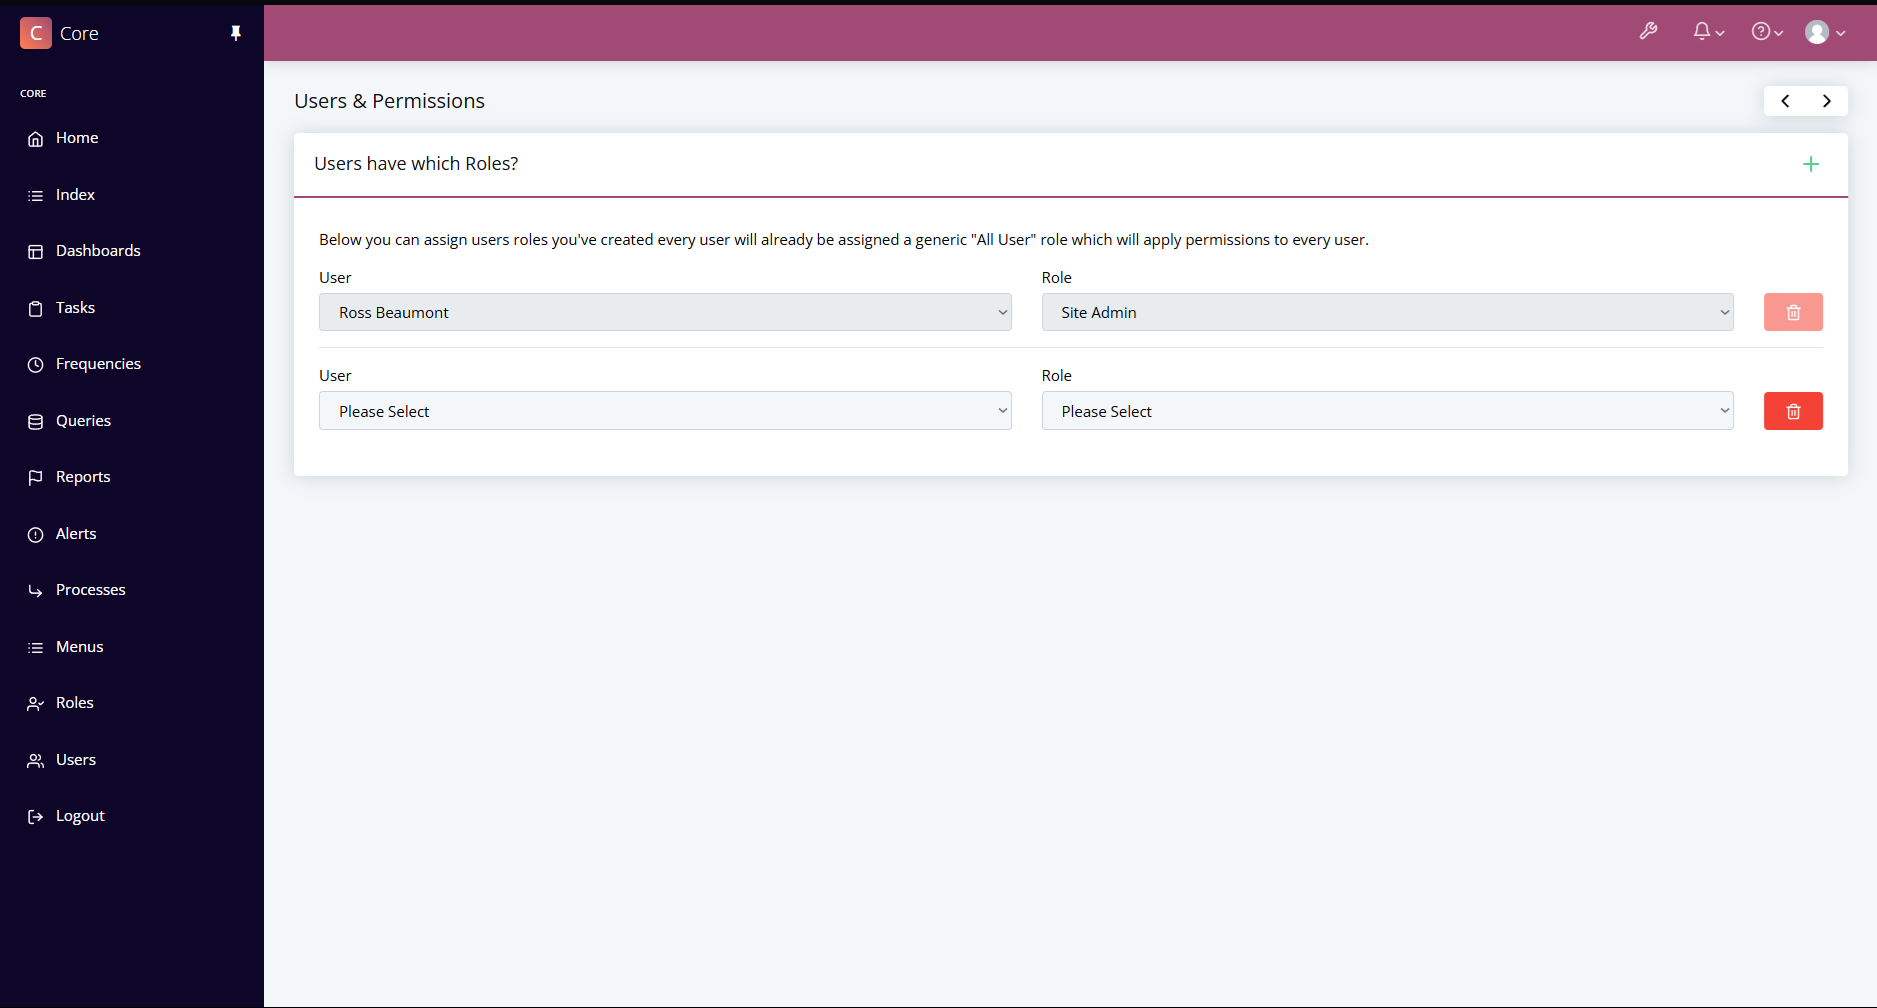
With the Users and the Roles now created, you can assign each user to their Roles. To do this, add a new row by clicking the green plus in the top right corner. This will give you two dropdowns, one to select the User and one to select the Role. If you want to assign multiple Roles to a User, you can use multiple rows to give the multiple Roles.
Once the Roles have been assigned, clicking the right arrow in the top right will assign the Roles and return you to the setup dashboard.