Adding Permissions to Roles
In this section we will go through the step by step process of adding a permission to a role. You can either follow the steps below or you can view our video tutorial by clicking the following link:
Video Tutorial - Adding Permissions to Roles
To add a permission to a role, simply select the content type called roles. Once the list view has opened scroll down to the role you are wanting to add permissions to. Once you have found your role, click on the Permissions button on the right hand side.

Now you can click on the Add Content Type button in the top right corner of the page.

Once selected, scroll down to the bottom of the page. You should see that a blank permissions template has opened. Here is where you can input the relevant information for the new permissions for a role. First, use the dropdown box to select the content type you are wanting to give permissions to. Now you can toggle the permissions bars to set the permissions as required as below. If you would like to find out what each permission does you can find a table here: Permissions
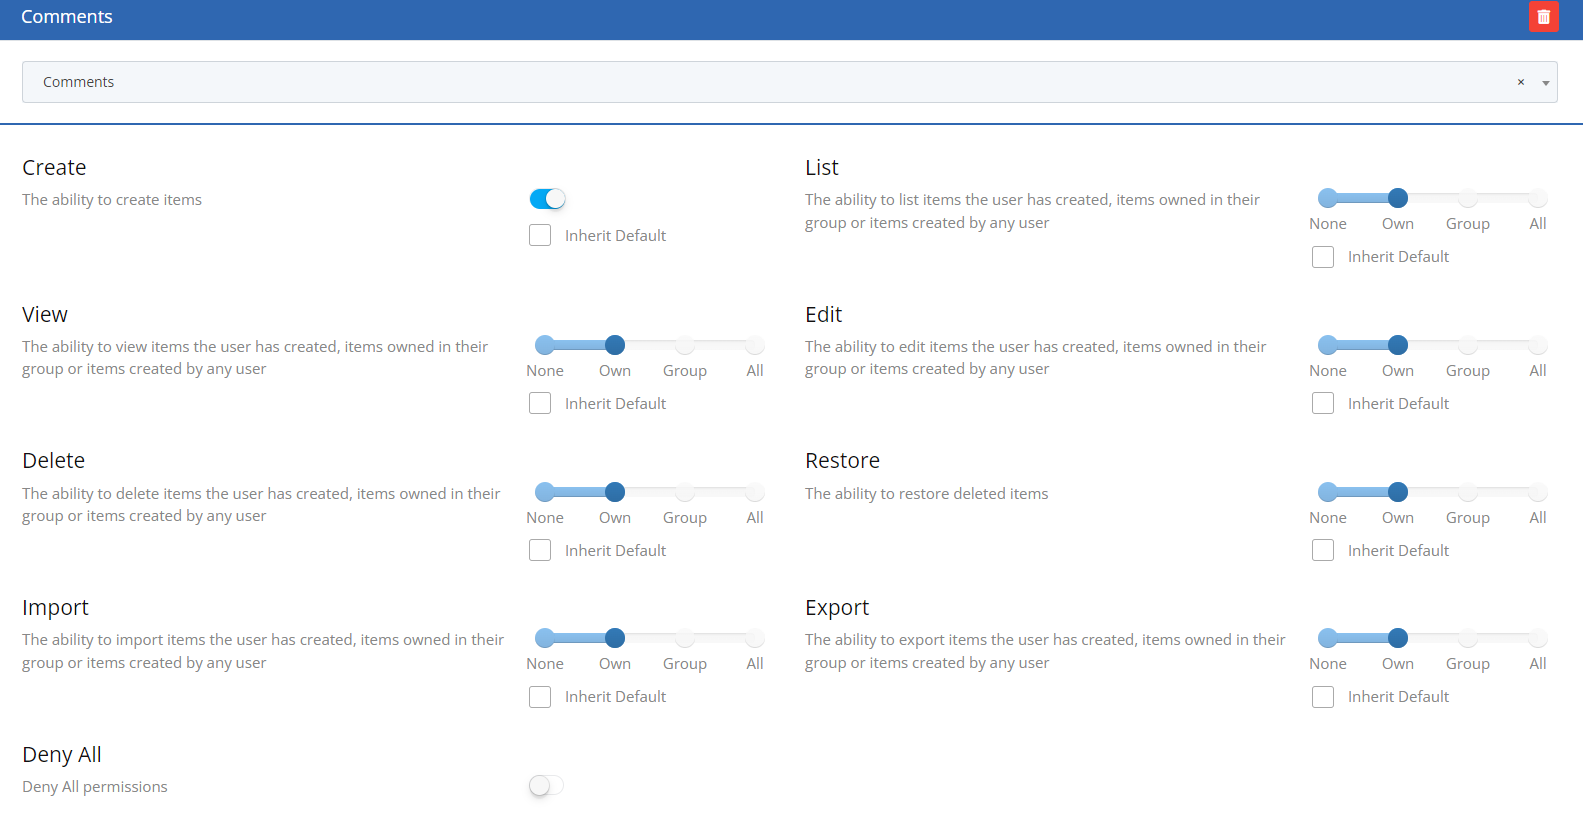
Once you are happy with the changes made, you can scroll back to the top of the page and save.

Now any users allocated to this role will have the correct permissions set for the content type selected.
If you would like to find out how to add permissions to a content type, you can click the following link to find out more: Add Permissions to a Content Type