Update Mailchimp Process
In this section we will go through the steps to the Update Mailchimp process. For this example we will be creating a process that adds a client on to a Mailchimp Audience.
To see an example of this working, check out this video!
Video Tutorial - Update Mailchimp
Building the Update Mailchimp Process
You should see a button on the nav bar on the left on your Core site called Core Processes. Click on that button and you will be directed to the Core Process list where you can create a new one.

Once you are in the list view, click on the plus icon in the top right to create a new process.
Now type in a name for your process and press save.

Now in the Process list view you should be able to see your new process.

Let's go ahead and start building the process!
First, click on the edit button to access the Process Builder. Once you are in the list view, click on the plus icon in the top right to create.
First lets fill in the options on the bar on the left. If you would like to find out more about what the options on the left mean you can find the definitions here: Option definitions
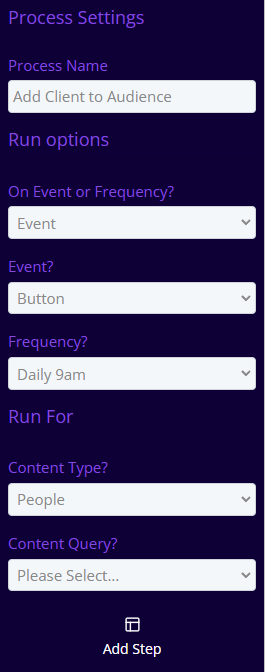
Now we have inputted the options let's build the process step where we update Mailchimp!
Click on the Add Step button on the left. For the step type we will be selecting the Update Mailchimp option. For the next options we will be selecting the content type that the email addresses are logged. This will most likely be a People or Client content type. Then select the action you want to use. For this example I will be selecting the Add to Audience option.
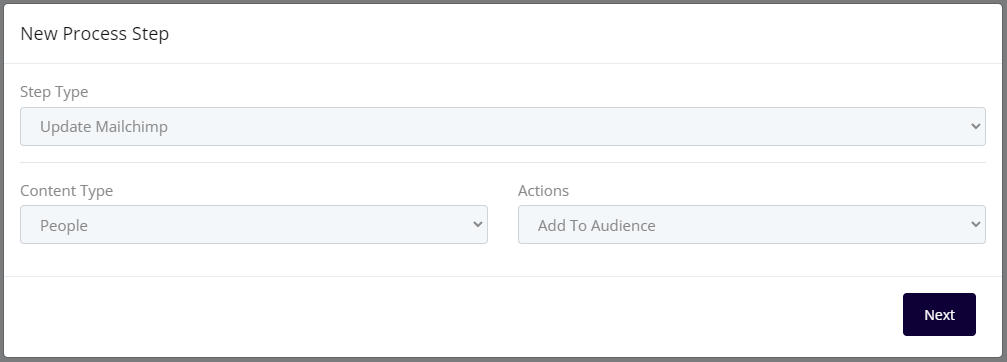
Once you have filled out your first settings click on the Add Step button. Now select the email address field in your selected content type. These will be the email addresses used to update Mailchimp. Then select the audience you would like to push the users to.
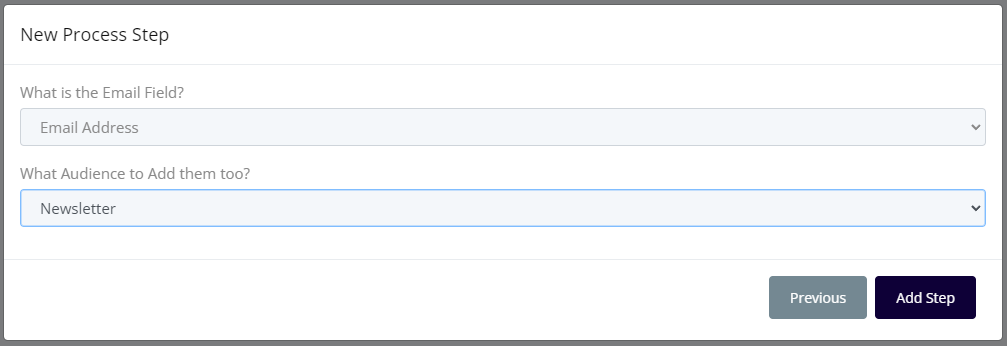
Now you have all of your settings you can save them and save the process. Now all you need to do is add the button onto the content type.
To see how to add a button you can view the steps by clicking on this link.
Once you have added on your button you can go ahead and start adding clients into your audience just by clicking the button on a client!