Convert Content Type process
In this section we will go through the steps to create a Convert Content Type process. For this example we will be creating a process that converts a Quote into a Job when you click a button on the Quote.
To see an example of this working, check out this video!
Video Tutorial - Convert Content Type
Building the Convert Process
You should see a button on the nav bar on the left on your Core site called Core Processes. Click on that button and you will be directed to the Core Process list where you can create a new one.

Once you are in the list view, click on the plus icon in the top right to create a new process.
Now type in a name for your process and press save.

Now in the Process list view you should be able to see your new process.

Let's go ahead and start building the process!
First, click on the edit button to access the Process Builder.
First lets fill in the options on the bar on the left. If you would like to find out more about what the options on the left mean you can find the definitions here: Option definitions
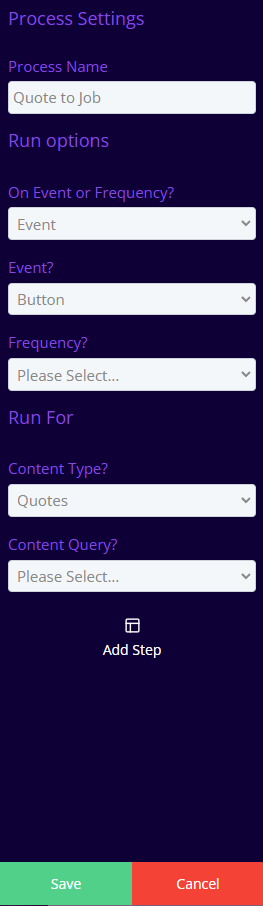
Now we have inputted the options let's build the process step where we convert the Quote to Job!
Click on the Add Step button on the left. For the step type we will be selecting the Convert Content Type option. For the next options we will be converting a Quote to a Job. Your settings should look like this:
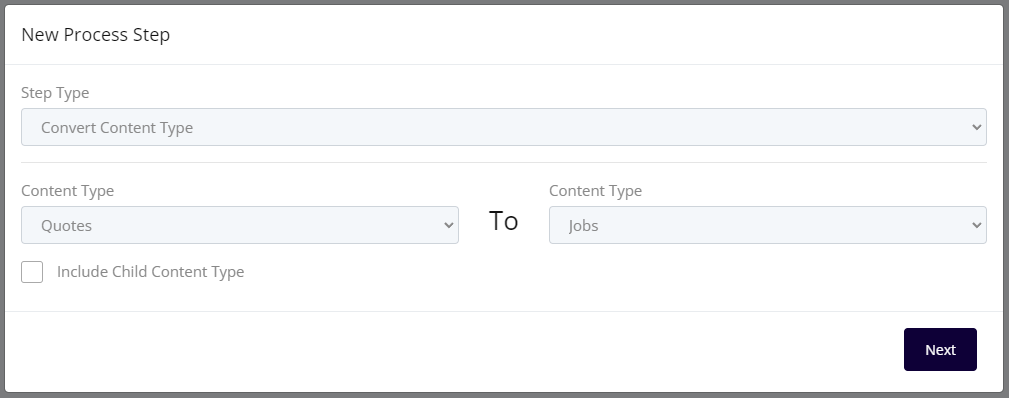
Now we have told the system which content types we would like to convert we can click Next Step. Here is where we can tell the system which fields we would like to pull through. The box on the left is the quote field, and the field on the right is the job field we would like to match on. We can add as many mappings as we like!
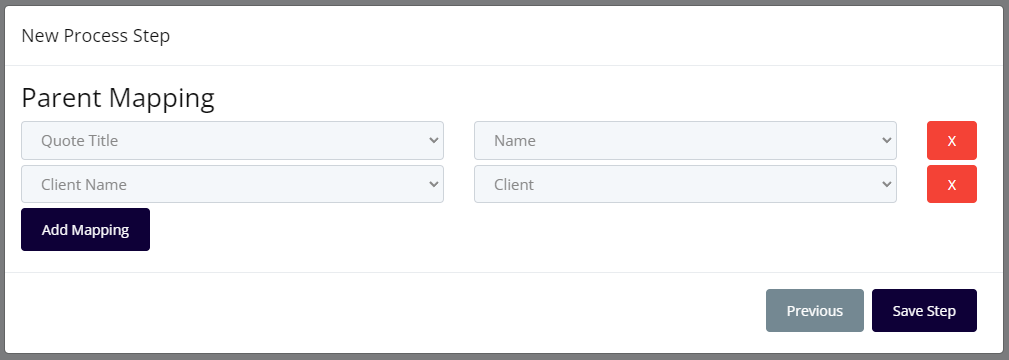
Now you have filled out the settings click on the Save Step button. Now click the save button on the bottom left of the process builder.
Adding an Update Step (Optional)
If we wanted to update a field on the Job when we create one, for example we could add a job status to say this Job is now active, we just need to go ahead and add a new step to the process.
To Add a new step like we did with the Convert Content Type, edit the Process we just created and once you are in the process builder, click on the Add Step button. This time we want to go ahead and select the Update Content Item option. The content type we will select is the Job content type as we are wanting to update a field on the Job once it has been created.
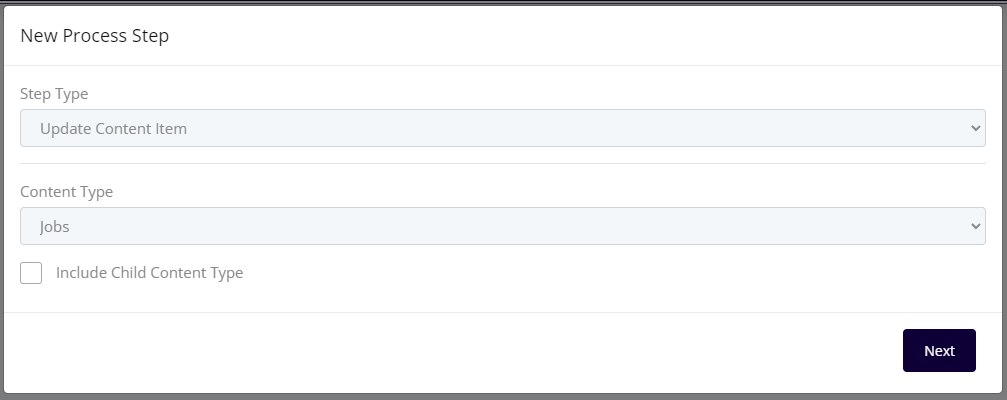
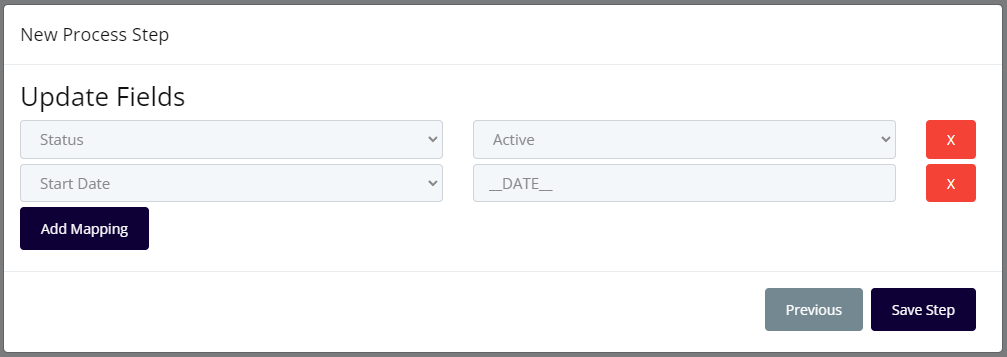
Now click Next, here is where we select the fields we would like to update. As we are wanting to update the Status file we wil select the status field and then select the option we would like to to automatically update to, so in this case we could select the status Active. I am also going to update the start date to automatically update to today's date.
Adding the button onto the event
To add the button onto the Quote content type we need to quickly head over to the layout builder so that we can add the button onto the form.
Go to the content type called content Types and look for the content type Quotes in the list view. Now click edit on the Quote Content Type.

Now click the Edit button on the Quotes Edit Layout. This will open the layout builder where you can add the button.
On the bar on the left you should see an option to Add a button to the form. Once the button appears, drag the button wherever you would like it to sit on the form.
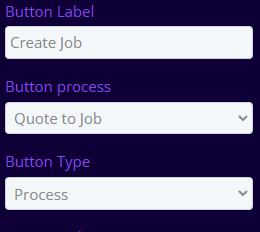
Now you have dragged the button onto the form, click on the button in the layout builder. You should see some more options appear on the left where you can tell the system which Process the button relates to. These are my settings,
| Button Option | Definition |
|---|---|
| Button Label | The name of the button on the form |
| Button Process | Select the process related to this button |
| Button type | The type of button, in this case it is a process button |
Now we have added in the settings we can save the layout builder in the bottom left!